Departments
Endodontics
Sep 2007 —
Vol. 1,
Iss. 1
Tips and Tricks for the Adhesive Cementation of Ceramic Inlays, Onlays, and Veneers
Bonded-porcelain and glass-ceramic restorations have
the advantage of being a conservative
treatment option for the esthetic
reconstruction of teeth, requiring significantly less tooth structure removal than conventional crown
procedures. However, to be successful
with bonded-porcelain procedures, exquisite
adhesive technique is required. Bonding porcelain restorations can be problematic and time consuming, which has caused many dentists to avoid using bonded-ceramic restorations.
This article will cover some clinical tips and
tricks that will facilitate the adhesive
luting process for inlays, onlays, and veneers.
TIPS FOR PROVISIONALIZATIONAND CEMENTATION
Fabricating and bonding provisional restorations at the preparation appointment
and then removing them at the cementation appointment has been problematic for
many reasons. Indirect fabrication of
prototypes is clearly the best technique but it can be time-prohibitive in the average general dental practice. The
direct fabrication of prototypes with bis-Acryl temporary materials has become
the standard. Directly curing bis-Acryl
materials on prepared teeth can bond the
prototypes to the teeth or lock them into undercuts, making their removal difficult and
also possibly damaging the preparations
upon removal. Many dentists recommend sealing prepared tooth structure at
the time of preparation, especially if dentin
is exposed. If the tooth has been sealed at the time of preparation it is likely that directly
curing bis-Acryl
materials on the tooth will bond these materials to the tooth structure.
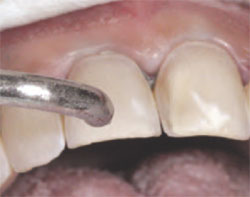
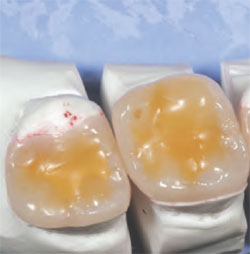
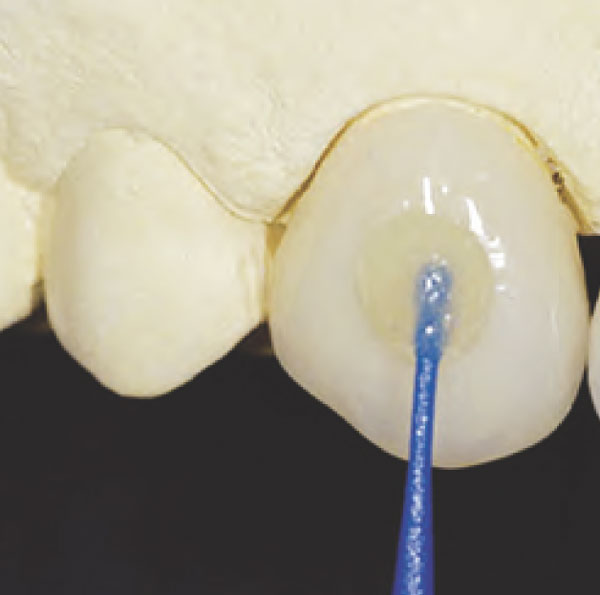
The authors also believe in sealing prepared tooth structure at the time of preparation, by using a thin film
thickness primer/adhesive combination to minimize sensitivity, and
preventing dentin contamination with temporary cements. Either
Adper™ Single Bond Plus Adhesive (3M ESPE, St. Paul, MN) or One-Step® (Bisco, Inc,
Schaumburg, IL) can be used for this application. To solve the problem of
the materials bonding to the etched and sealed
tooth once the adhesive has been cured, a
thin coat of Vaseline® (Unilever PLC, London, England)
is painted over the sealed tooth to act as a
separator. Figure 1 (View Figure) and Figure 2 (View Figure) show
examples of this.
The subsequently directly cured bis-Acryl will not
bond to the adhesive layer that has been covered with Vaseline, making it fairly easy to remove at
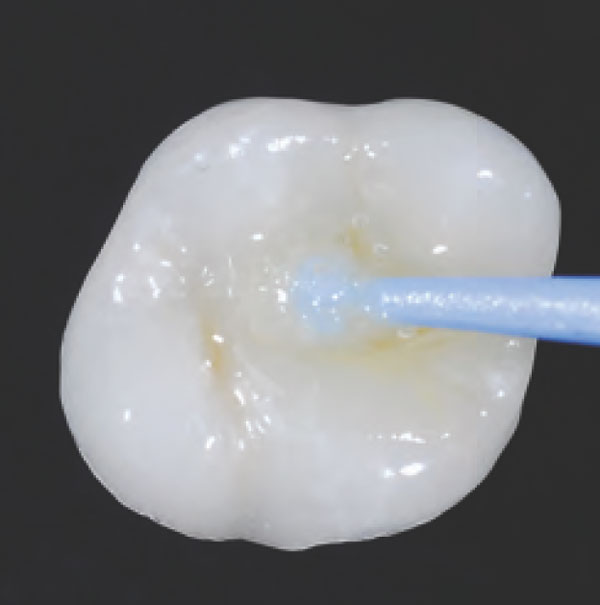
the cementation appointment. A small, circular area in the midfacial of the preparation can be
left uncovered with Vaseline; this area will bond to the bis-Acryl, providing
some retention of the prototype similar to the
spot-etch technique. Water-soluble silicone is not recommended for this purpose; the authors have tried this several times and found removal of the
prototypes difficult. Once the prototypes are removed
at the cementation appointment, it is ideal to
lightly air abrade the surface of the
tooth with aluminous oxide. This will effectively remove the oil-based Vaseline
and any contamination caused by microleakage.
Figure 3 (View Figure) shows a microetcher being used with 50-µm aluminous oxide set at 2 bars
(30 psi).
TIPS FOR RESTORATIONTRY-IN AND FITTING
Trying-in and fitting inlays, onlays, and veneers can be a tricky process.
Because of the small and fragile nature of
these types of restorations, they can easily chip or fracture if too
much force is applied.
Also, it is very difficult to try-in and cement them without some sort
of special carrying device. The authors have come up with two simple methods to attach
a “handle” to the restoration that
allows the easy seating and withdrawal of the restoration. In the first method, isopropyl alcohol is wiped over
the surface to
which the holder will be attached. For a veneer, it is the facial surface; for an inlay or onlay, it is the occlusal
surface (Figure 4 View Figure). A nylon primer
adhesive brush is used as the handle. An unfilled adhesive is
used to attach the handle to the restoration.
It is important to note that a primer/adhesive
combination material does not work well for this purpose. Instead, a
first-generation unfilled resin or a bonding agent for etched enamel should be used, because a viscous unfilled resin will not
flow all over the ceramic surface and
potentially run over to the internal surface
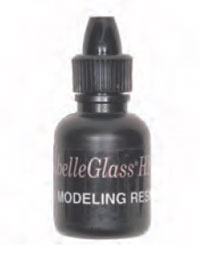
that is about to be bonded to the tooth. Examples of good materials for this are the
dual-etch bonding agent from the All-Bond® 2 kit (Bisco, Inc) or the
modeling resin from the belleGlass™ kit (Kerr Corporation, Orange,
CA), which actually works better because of the
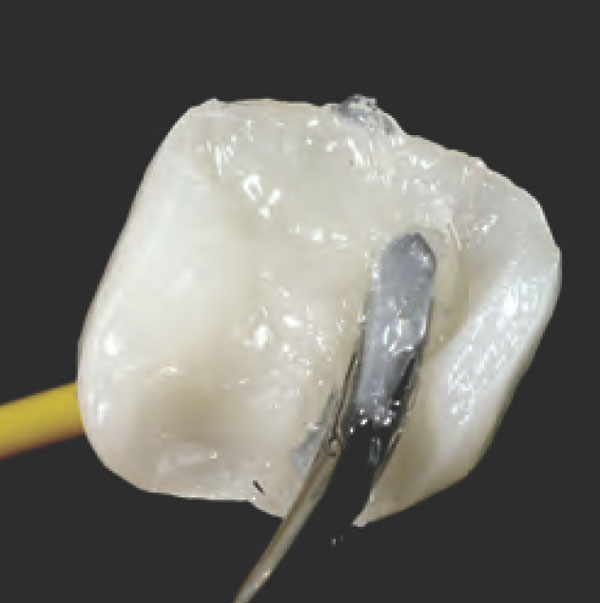
higher viscosity (Figure 5 View Figure). A drop of the resin is placed on the surface of the
ceramic and the tip of the brush is wetted with the adhesive. The
brush is placed in contact with the drop of
resin on the ceramic (Figure 6 View Figure) and then
light-curing of the adhesive is accomplished (Figure 7 View Figure). The brush
must be attached in such a way that when
carrying the restoration to place, the restoration is oriented
correctly to the preparation, ie, the distal aspect of the restoration lines up with the
distal aspect of the preparation (Figure 8 View Figure). To
remove the handle and the resin after final cementation, a sickle-shaped
curette is used.
The second technique uses a plastic handle with sticky wax on the end. The problem with these
devices is that they do not stick very well to
porcelain. To remedy this, first wipe the porcelain surface with
isopropyl alcohol as in the previous
technique. Then, with a bunson burner or electronic waxer, place sticky wax on the porcelain surface to which the holder should stick (Figure 9 View Figure). The sticky wax on the holder will now stick very well to the porcelain restoration (Figure 10 View Figure). After
final cementation, spray water on the wax and
it will easily flip off with an instrument.
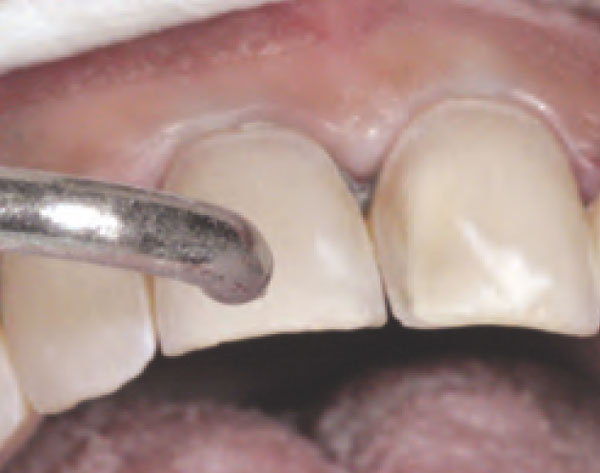
Marking with articulator paper and adjusting
interproximal contacts is done using the same
handle technique. The authors use Parkell,
Inc’s (Edgewood, NY) double-sided articulating film. A small piece is cut and held in small hemostats. This is held
in the contact area while gentle seating
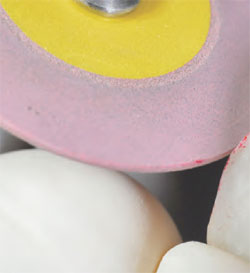
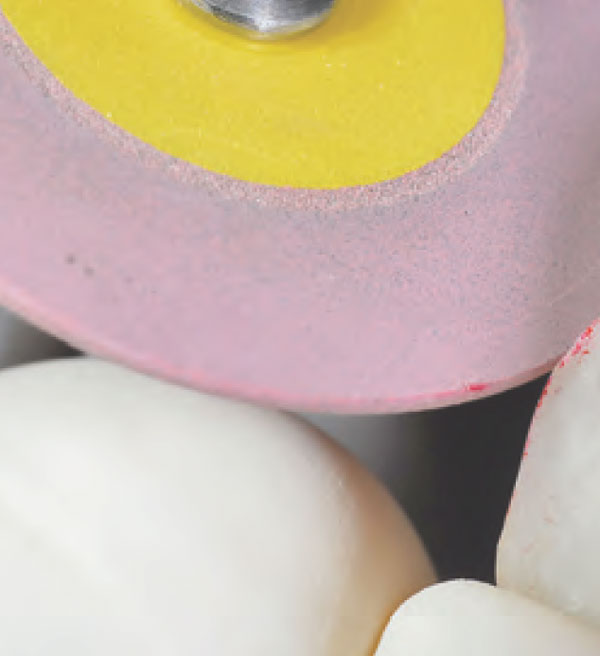
pressure is applied to the restoration (Figure 11 View Figure). One of the instruments the authors like to use to adjust contacts is the knife-edge pink CeramiPro™ Dialite® disc from
Brasseler USA® (Savannah, GA) (Figure 12 View Figure). Once the contact
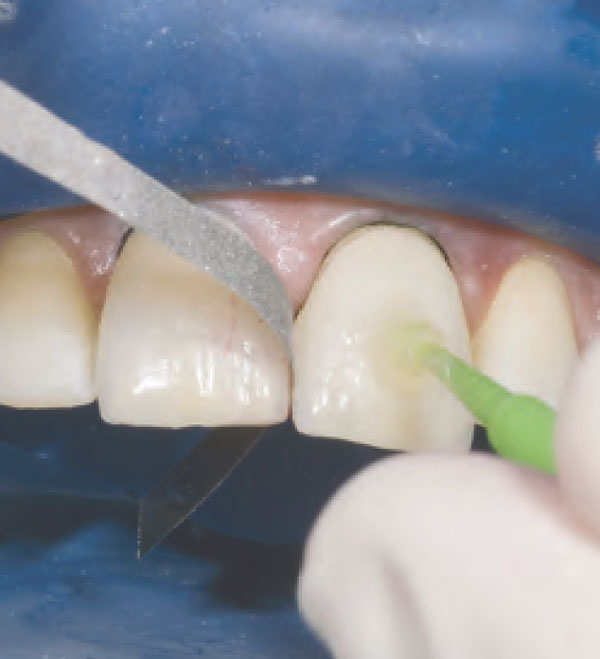
gets close, a fine metal finishing strip is used to a broad, even contact inciso-gingivally (Figure 13 View Figure). Once adjusted,
the final polishing is done with the knife-edge
gray Dialite disc.
TIPS FOR CEMENT COLORVERIFICATION AND MODIFICATION
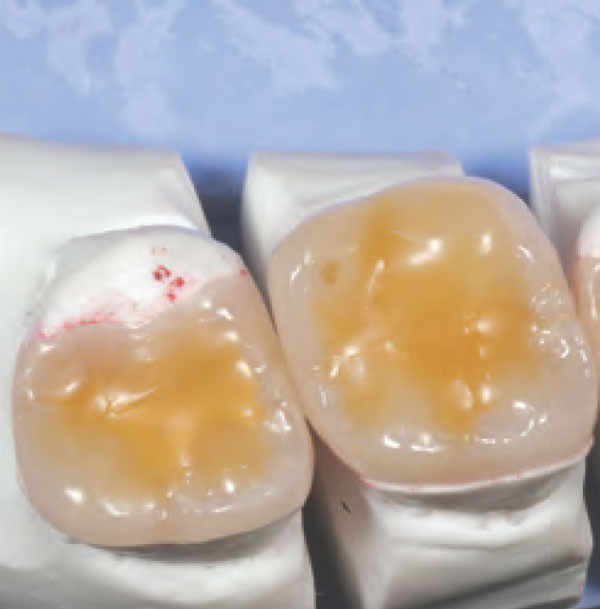
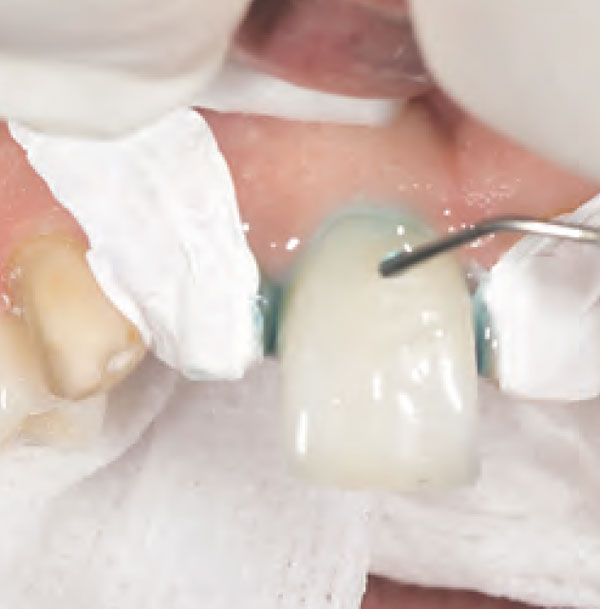
When trying-in veneers, a try-in paste should be used
to verify shade. The authors start with a clear try-in paste to see if the
bonded veneer will have the desired value (Figure 14 View Figure). If the veneer is not
bright enough, the authors recommend adding opaque to the clear try-in
paste in 5% increments until the desired value is obtained (Figure 15 View Figure).
More than about 25% opaque white will tend to make the veneer look
artificial. The amount of opaque white is noted and this ratio of opaque to
clear is used in the final bonding procedure.
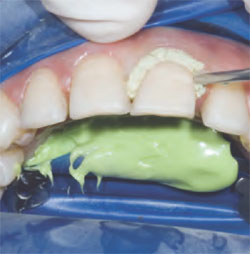
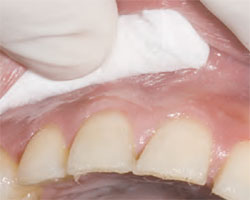
TIPS FOR GINGIVAL RETRACTION
If the margins are at or below the gingival margin,
gingival retraction must be accomplished. Traditionally,
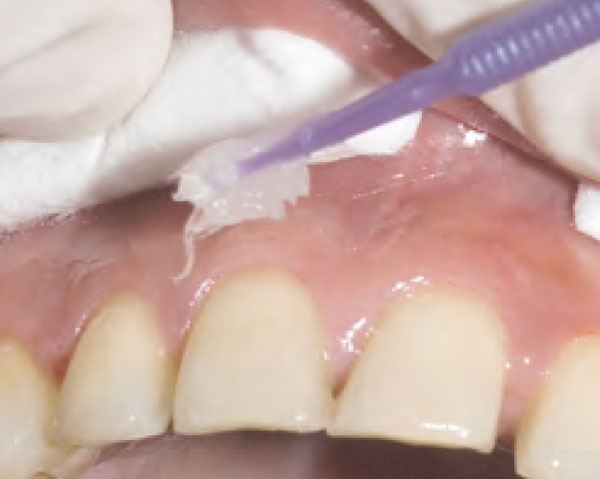
retraction cord is used for this. If only minor retraction is necessary, an
injectable retraction material called Expasyl™ (Kerr
Corporation) is useful for this process (Figure 16 View Figure). It is
significantly faster to place than conventional
cord and gives adequate retraction for this
procedure. It is absolutely critical to remove the Expasyl by copious water
irrigation of at least 15 seconds before
starting the adhesive procedure.
TIPS FOR ISOLATION DURING BONDING PROCEDURES
If etchant and bonding materials get on adjacent teeth during the bonding process, the teeth can literally end up splinted together. Separating the teeth can be
quite difficult and may damage the restoration and adjacent
teeth. Thus, when bonding inlays, onlays, and
veneers, it is important to isolate the tooth
receiving the restoration. Thin matrices have been recommended but even thin
matrices can prevent the seating of the restoration. The authors have found a technique for interproximal isolation that was introduced by Dr. William Liebenberg.
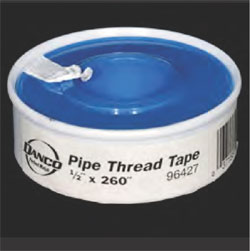
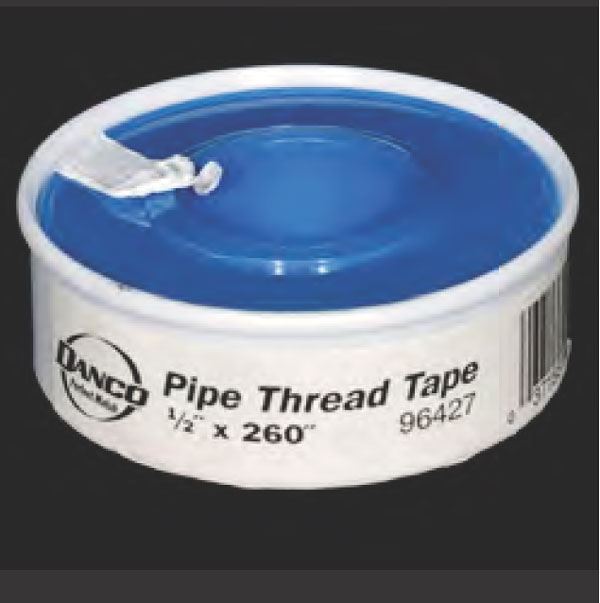
The technique uses “plumbers” tape (Figure 17 View Figure), which is a
very thin Teflon® material (EI du Pont de Nemours and Company,
Wilmington, DE) that comes in rolls and is
used by plumbers to seal water pipes wherever there is a joint. Plumbers tape can be purchased
at any hardware store. A short piece of the
tape is cut and stretched over the contact of
the adjacent teeth where the restoration is
going to be seated (Figure 18 View Figure and Figure 19 View Figure).
The tape can be pulled so thin that it can be
seen through. The tape is left in for the
etching, priming, adhesive, and restoration placement steps. Most times the restoration will seat fully with the tape in
place. If the restoration does not appear to
seat fully and the excess cement is removed as normal, then the tape can be easily removed, allowing complete seating.
Because no etchant, primer, adhesive, or resin
cement has been allowed to contact the
adjacent teeth, there will be no problem of
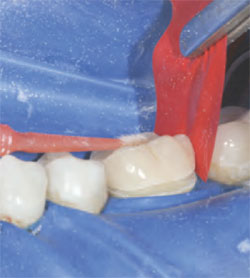
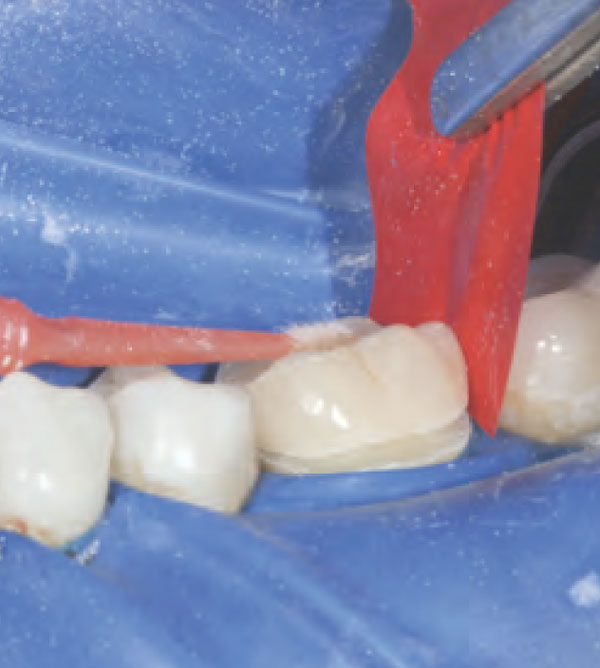
splinting adjacent teeth. One trick that can be used for cementing inlays and onlays to
help remove the excess cement before polymerization is to place a piece of dental tape or floss below the preparation
margin (Figure 19 View Figure). Once the onlay is seated the tape is pulled out, bringing much of the excess cement with it. This is done before polymerization.
TIPS FOR ETCHING AND PRIMER/ADHESIVE APPLICATION
The authors still believe in the total-etch technique
for the adhesive cementation of bonded porcelain and glass ceramic
restorations. Either 32% or 37% phosphoric acid is placed on the prepared
tooth structure and left for 20 seconds, then rinsed with water for 10
seconds. Instead of drying with compressed air,
nitrogen is used to dry for 1 to 2 seconds. A slight sheen should be visible on the tooth, with no pooling of water. A
primer/ad-hesive bonding agent is then
applied (eg, OptiBond® Solo Plus™, Kerr
Corporation) and thinned with a nitrogen spray at 3 bars. The
compressed nitrogen does not introduce oxygen
bubbles, which can create problems with the
cure. The nitrogen is also clean, as many compressed air lines contain
moisture and contaminants. Precuring the adhesive can prevent complete
seating of the final restoration. This is especially true for inlays and onlays. If curing is a
concern, then the activator from the OptiBond Solo Plus is added to make it dual-cure.
TIPS FOR RESIN CEMENTINGAND CEMENT REMOVAL
One fundamental decision that needs to be made is how
many restorations are to be adhesively bonded at a time. The authors have tried every technique on one, two, or multiple
restorations at once. Cementing multiple restorations at once, while very fast during the cementation process, was found to
be moderately time consuming in removing
the set cement and polishing. Also, the isolation technique previously discussed cannot be used with simultaneous multi-unit
cementation. The authors prefer
to bond one restoration at a time using
medium-viscosity resin cement. All of the excess cement can be removed before light polymerization.
Because there is minimal clean-up with
this technique, the total treatment time to
bond restorations in this manner was found to be the same as the multi-unit
technique, considering cement removal time.
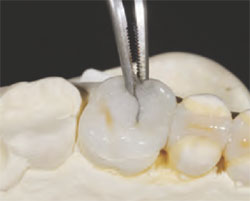
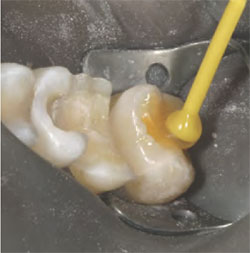
In the following examples, the
restoration was filled with cement (Figure 20 View Figure) and then
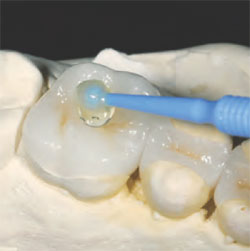
seated intraorally. Excess cement was removed with a composite brush
(Figure 21 View Figure). The restoration was tacked to place with a 5-second cure
in the center of the tooth. Any excess cement was easily removed
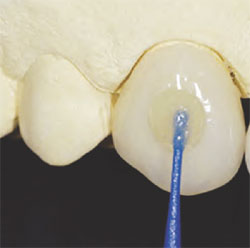
before final polymerization. An air-barrier coating needed to be applied to
the cement margin area to cure the air-inhibited layer. A good material for
this is Liquid Lens™ (Danville Innovative Dental Products, San Ramon,
CA) (Figure 22 View Figure). After application, the resin cement was completely
photo-polymerized. Because there was very little cement left, it was easy
to remove with a micro periodontal curette or a #12 Bard-Parker™ blade (BD
Medical, Franklin Lakes, NJ). Ideally, the margins of your
restorations should never be touched with a bur as it will be virtually impossible to achieve the same level of finish that
was obtained by proper glazing
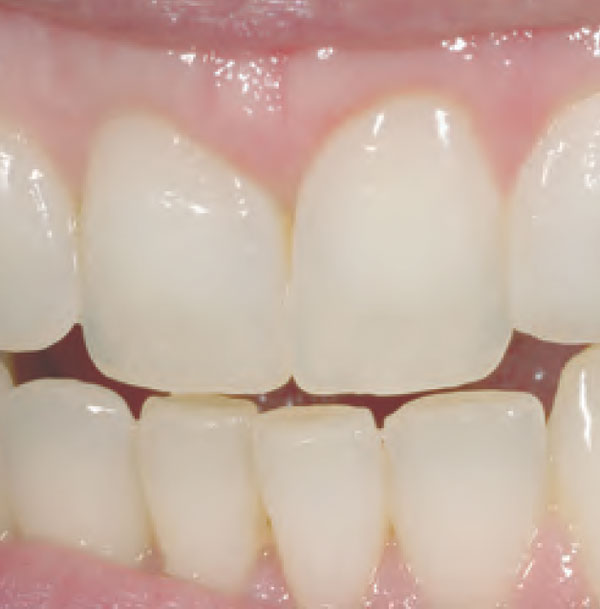
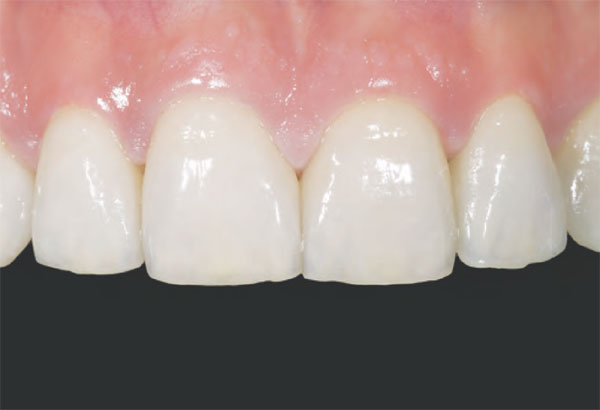
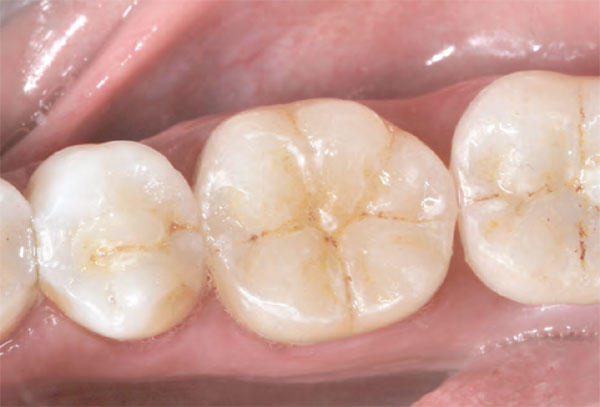
and polishing in the laboratory. Figure 23 ( View Figure) and Figure 24 ( View Figure) show the
examples of finished veneer and inlay/onlay cases.
|
|
| Figure 1 Nylon adhesive application
brush with Vaseline
ready to apply to the etched
and sealed prepared teeth. |
Figure 2 It is important to apply
Vaseline to any area where the
bis-Acryl should not bond,
especially all of the margins. |
| |
|
 |
 |
| Figure 3 Using a microetcher
to lightly sand blast the surface
of the prepared teeth before
final adhesive procedures. |
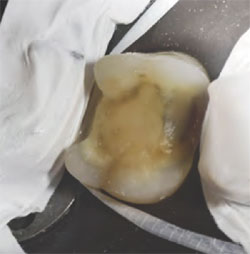
Figure 4 Cleaning the surface
of an onlay with isopropyl alcohol. |
| |
|
|
 |
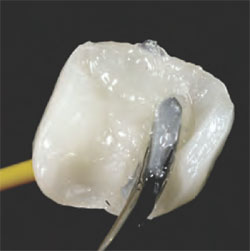
| Figure 5 Modeling resin is
used to attach the composite
nylon brush to the onlay. |
Figure 6 The onlay with a drop
of the viscous modeling resin is
placed on the occlusal. The brush
is wetted with the resin, placed
in contact with the occlusal resin,
and the complex is light-cured. |
| |
|
 |
 |
| Figure 7 A nylon adhesive
brush is attached to a veneer. |
Figure 8 The correct orientation
of the restoration to the
brush. The brush comes off to
the mesial and at a slight angle
to the occlusal of about 20°. |
| |
|
 |
 |
| Figure 9 Sticky wax is placed
on the occlusal surface of a quadrant
of glass ceramic restorations. |
Figure 10 Trying-in the restoration
with the sticky wax/sticks
combination. |
| |
|
 |
 |
| Figure 11 Using the attached
nylon brush in conjunction
with articulator tape helps to
check interproximal contacts
with hemostats. |
Figure 12 Adjusting the interproximal
area with the pink
Dialite knife-edge disc. |
| |
|
 |
 |
| Figure 13 Using a fine metal
finishing strip to adjust the contact
before cementation. |
Figure 14 Veneer tried-in on
tooth No.10 with a clear try-in
paste. Note that it is lower in
value than the adjacent teeth. |
| |
|
 |
 |
| Figure 15 The same veneer
with 10% opaque try-in paste
mixed in the clear paste. Note
that the value is much closer.
This combination of opaque
and clear was used for the final
cement color. |
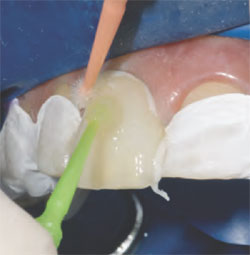
Figure 16 Using Expasyl for
slight gingival retraction before
adhesive bonding of the veneers. |
| |
|
 |
 |
| Figure 17 The plumbers tape
(Teflon tape) is used for isolation. |
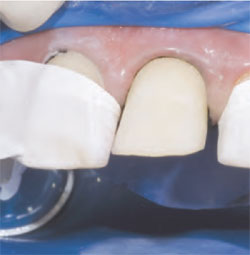
Figure 18 Anterior veneer
preparation is isolated using
plumbers tape. |
| |
|
 |
 |
| Figure 19 An onlay preparation
is isolated using plumbers
tape. To help cement removal,
dental tape can be placed
below the margin as shown
here on the distal. |
Figure 20 Placing resin cement
into the onlay that is being held
by the bonded composite
nylon brush. |
| |
|
 |
 |
| Figure 21 The excess composite
is removed before
cementation with a composite
nylon brush. |
Figure 22 Applying Liquid
Lens gel to cure through and
completely polymerize the
cement, eliminating the oxygen-
inhibited layer. |
| |
|
 |
 |
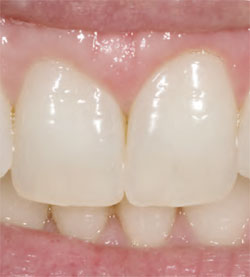
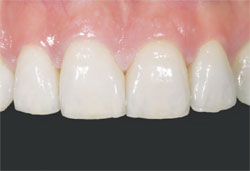
| Figure 23 A finished veneer case. |
Figure 24 A finished inlay and onlay case. |


